2.7 – The distorting lens

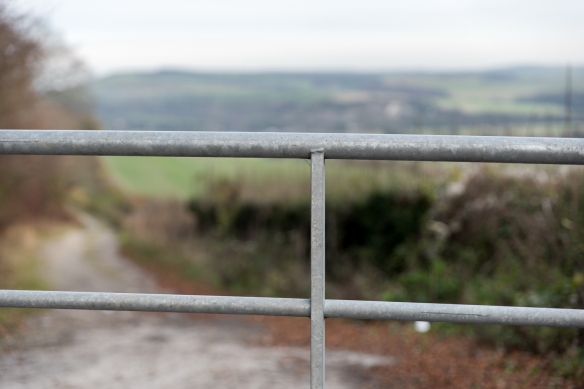
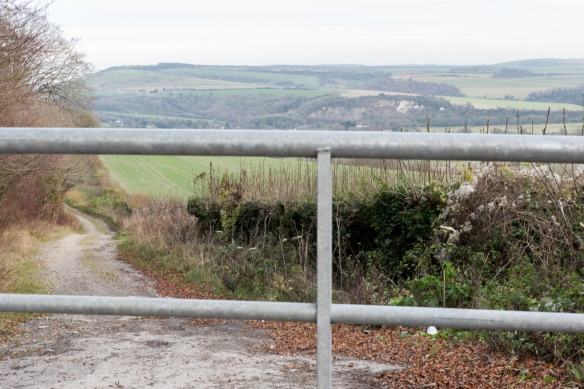
Use a combination of small apertures and wide lens to take a number of photographs
exploring deep depth of field. Because of the small apertures you’ll be working with
slow shutter speeds and may need to use a tripod or rest the camera on a stable
surface to prevent ‘camera shake’ at low ISOs. Add one or two unedited sequences,
together with relevant shooting data and an indication of your selects, to your
learning log.

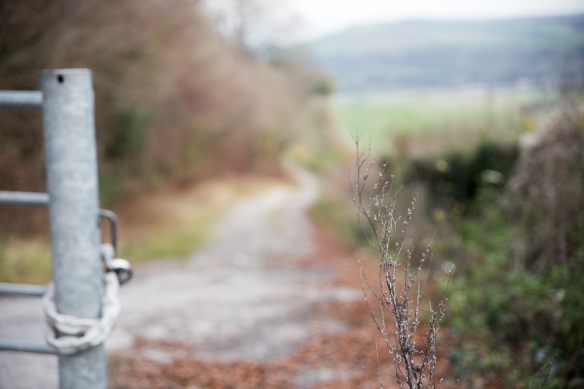
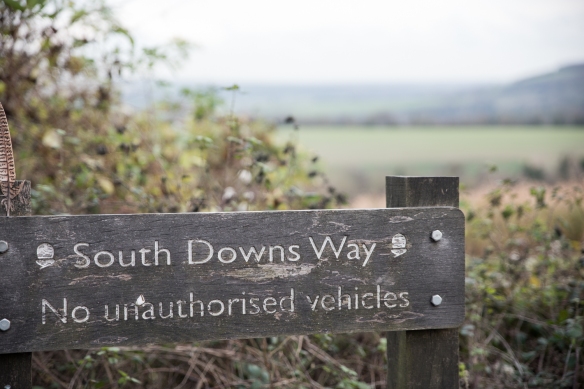
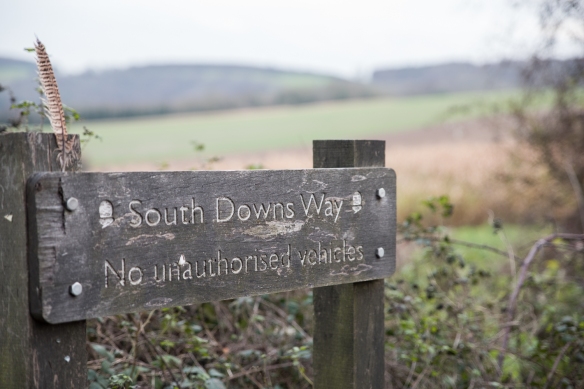
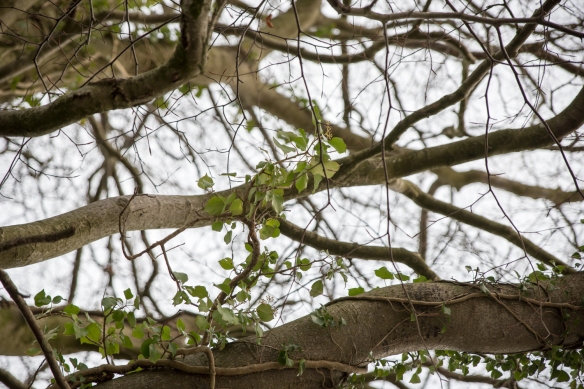
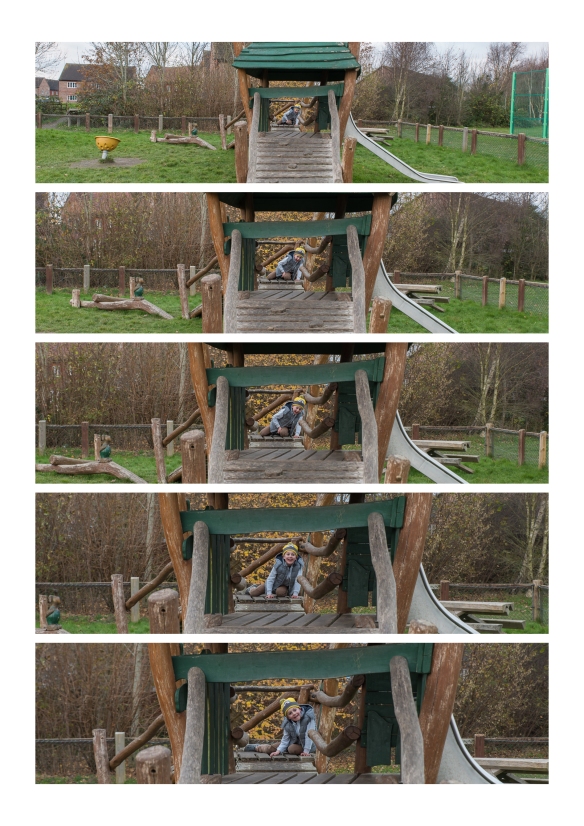
Achieving deep depth of field might appear easy compared to the difficulties of
managing shallow depth of field. We’re surrounded by images made with devices
rather than cameras whose short focal lengths and small sensors make it hard
to achieve anything other than deep depth of field. The trick is to include close
foreground elements in focus for an effective deep depth of field image. Foreground
detail also helps to balance the frame, which can easily appear empty in wide shots,
especially in the lower half. When successful, a close viewpoint together with the
dynamic perspective of a wide-angle lens gives the viewer the feeling that they’re
almost inside the scene.

all images taken using Aperture Priority – ISO 200, 24 mm, f/22 (the highest my lens would go) and 1/4 sec. Taken  using a tripod

_DJF2688_DJF2694-Edit_DJF2728-Edit_DJF2734

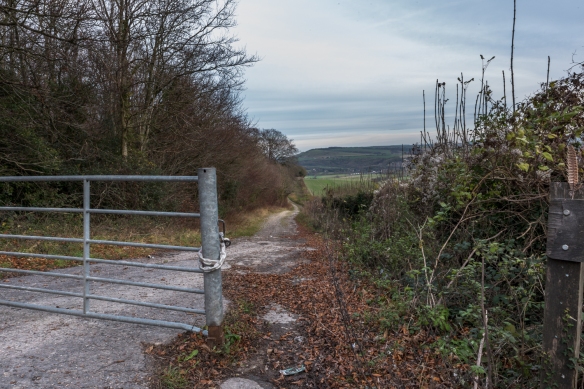
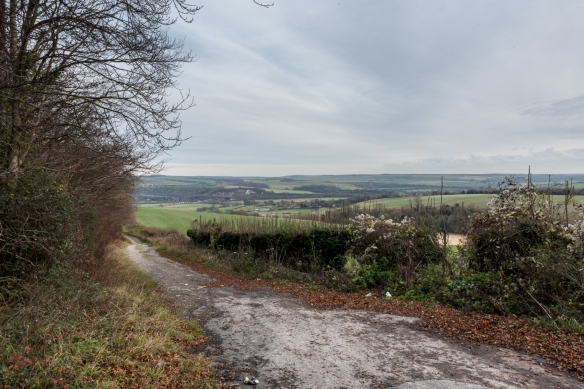
These do give a better feel of being there in the landscape

2.6 – The distorting lens

Exercise 2.6
Use a combination of wide apertures, long focal lengths and close viewpoints to take a number of photographs with shallow depth of field. (Remember that smaller f numbers mean wider apertures.) Try to compose the out-of-focus parts of the picture together with the main subject. Add one or two unedited sequences, together with relevant shooting data and an indication of your selects, to your learning log.

Wide apertures create shallow depth of field, especially when combined with a long focal length and a close viewpoint. In human vision the eye registers out-of-focus areas as vague or indistinct – we can’t look directly at the blur. But in a photograph, areas of soft focus can form a large part of the image surface so they need to be handled with just as much care as the main subject.

Don’t forget that the camera’s viewfinder image is obtained at maximum aperture for maximum brightness and therefore at the shallowest depth of field. Use the depth of field preview button to see the actual depth of field at any particular aperture. (This is especially useful in film cameras where you don’t have the benefit of reviewing a shot immediately after you’ve taken it). It’s surprising to see the effect that a single f stop can have on the appearance of an image.

_DJF2696

ISO 200, 70 mm, f/2.8, 1/200

_DJF2692

ISO 200, 70 mm, f/2.8, 1/160

_DJF2713

ISO 200, 70 mm, f/2.8, 1/160

_DJF2726

ISO 200, 70 mm, f/2.8, 1/125

_DJF2732

ISO 200, 70 mm, f/2.8, 1/200


2.5 – The distorting lens

Exercise 2.5
Find a subject in front of a background with depth. Take a close viewpoint and zoom
in; you’ll need to be aware of the minimum focusing distance of your lens. Focus on
the subject and take a single shot. Then, without changing the focal length, set the
focus to infinity and take a second shot.

_DJF2700

Shallow Depth of Field, Close viewpoint

_DJF2699

deep depth of field, long focal point

wasn’t sure I got it quite right out in the field, so tried it again at home, although I think both sets demonstrate the point about close viewpoints and focal point


2.4 – The distorting lens

Exercise 2.4
Find a location with good light for a portrait shot. Place your subject some distance in front of a simple background and select a wide aperture together with a moderately long focal length such as 100mm on a 35mm full-frame camera (about 65mm on a cropped-frame camera). Take a viewpoint about one and a half metres from your subject, allowing you to compose a headshot comfortably within the frame. Focus on the eyes and take the shot.

Longer focal lengths appear to compress space, giving a shallower depth of acceptable sharpness, which is known as depth of field. This makes a short or medium telephoto lens perfect for portraiture: the slight compression of the features appears attractive while the shallow depth of field adds intensity to the eyes and ‘lifts’ the subject from the background.

_DJF2662-Edit

Stanley, December 2017

_DJF2671-Edit

Riley, December 2017

This gorgeous pair both wanted to pose for this exercise, so obviously I had to photograph them both.

Aperture Priority: f/2.8, 70 mm, 1/250 sec, ISO1000

Particularly in the image of Riley, you can see the very shallow plane where sharpness is in the three fence strips level with him. The wall in the distance is just a colour and shape. In both images, the subjects standout from the background.

I absolutely love the image of Riley when edited in black and white. I also added a colour look up filmstock layer to give it timeless film quality.   There seems to be a real connection with him, which I think is more pronounced in the black and white version and I like the fact he’s not smiling.

_DJF2671-Edit_1.jpg

Riley

2.3 – The distorting lens

Exercise 2.3:

Choose a subject in front of a background with depth.  Select your shortest focal length and take a close low viewpoint, below your subject.  Find a natural point of focus and take the shot.

I chose to display this image in black and white, because it emphasises the distortion.

The model is only 9″ tall, but looks much bigger in relation to its surrounds because of the low viewpoint.  The background also appears to be falling backwards, even though it’s perfectly vertical wall.

Finally the bottom of the model (closest part to the viewpoint) looks out of proportion with the rest of the model.

This answers my question of Exercise 2.2, in relation to my height.  I will need to be aware of that when taking photos, especially portraits as using this angle might distort someones features.

Traditionally, this focal point might be used for a man, in order to make him look taller and more powerful in the frame!

2.2 – The distorting lens

For this exercise, I have taken a photo where the subject is in front of a background with depth.

The first shot was taken at a focal length of 70 mm and the second shot at 24 mm.  In order to keep the subject at a similar size in the frame, I had to move forward to take the second shot.

_DJF2654_RalphX2.jpg

When putting the images side by side it is really easy to see how the combination of focal length and viewpoint is affected by ‘perspective distortion’.

Perspective distortion is a normal effect of viewing an object.  It is thought that the human eye is similar to a 50 mm (full frame) lens, which is about half way between this two images.  Therefore, if you wanted to take an image that best represented how it is seen then use a 50 mm lens.  Our eyes would however, see a much wider field as our field of vision is probably closer to the 24 mm lens, as shown in excercise 2.1 

Other things I have noted in these two images, are that although both were taken at an aperture of f/4,  the 2nd (24mm) photo, has much more of the foreground is in focus and secondly, the background is much further away and sharper.

For a portrait like this, I think I would prefer the 70 mm version, as the subject stands out more in the image, and I also prefer the angle. (notwithstanding the fact that he doesn’t have a street light coming out of his head!!). There seems to be more definition between him and the background.  However, the 24 mm focal length would be better for Landscapes where keeping things in focus throughout the image is more desirable.

I wonder if the fact that I am only 5 ft 2″ has an impact on this, as in having to get closer to keep the subject in the centre of the image, I ended up looking up a bit? If had been taller would this be an issue?


2.1 – The distorting lens

Exercise 2.1

Find a scene that has depth. From a fixed position, take a sequence of five or six shots at different focal lengths without changing your viewpoint. (You might like to use the specific focal lengths indicated on the lens barrel.)

Technical Information:

exercise 2.1 metadata

screenshot of metadata shown in Adobe Lightroom

It was only after completing this exercise, that I realised that I had set the camera manually rather than using aperture priority. So I have now changed the priority mode and will use if for the subsequent exercises in this Part.

Nikon D810 Camera (fx sensor)

The focal lengths used were:

  • 24 mm
  • 38 mm
  • 46 mm
  • 58 mm
  • 70 mm

using a Tamron SP 24-70mm F2.8 Di VC USD A007N Lens

f/5.6
1/40 sec
ISO 400

Photos were taken in RAW, imported into Adobe Lightroom for minimal editing and saved as 1500 px Jpgs.  None of the images have been cropped or straightened.

This slideshow requires JavaScript.

The lens I was using has a zoom range from fairly wide at 24 mm up to a mid range zoom of 70 mm.  This is the lens I tend to use as my ‘go to’ everyday lens.

The first and widest photo, gives an overall view and helps place the climbing frame in its place. As the images scroll through, you do get a sense of moving towards the subject and the subject becomes more dominant to eye, so you look less at the surrounding elements in the image.

focal length exercise 2.1.jpg

In this experiment, I have blown up a section of each of the photographs so that they are almost the same size. Obviously, the 24 mm needed to be blown up much more than the 70 mm photograph, but interestingly quality in the detail at this magnification, doesn’t seem to be that different.

focal length comparison

but when magnified even more, you can start to see the difference in the amount of detail that has been recorded between the 24 mm shot on the left and the 70 mm shot on the right:

_DJF2593_more zoom

Had my objective been to focus in on the boy, then getting closer and zooming would have been a better option to get a sharper image.  However, in the context of him being a part of the wider photo, the quality is ok