Collection – testing

My first test shots for this assignment has thrown up some things I like, and some I don’t.

My initial thoughts were to see the person behind the glass, but I really liked the images where you can only see part of the person.  I also quite like the idea of viewing a corner where perhaps there may be something different happening on each side of the corner.

Contacts-1_MarkedContacts-2_markedcontacts-3.jpg

contacts-4.jpg

I realised this ‘through a window’ is a recurring theme in my photography so I looked through my archive to see if there were any photos that would compliment this assignment.  After all I think a ‘collection’ probably takes a long time to collate.

However, what I found was, that the photos I found didn’t really ‘fit’ with the theme and I also thought about the thinking that has gone into developing this idea and that the consciousness I am using to take these images means I am actually going out to take these images and I don’t want to just make earlier photos ‘fit’ when they weren’t taken with this purpose.

The themes I like in the images:

  • through the window
  • obscured view of person / blurred
  • reflection
  • warm light inside
  • asymmetrical lines from window frames
  • old frames

The themes I didn’t like:

  • modern frames
  • people to prominent

I was originally thought I would choose a portrait format, but have now decided to go for a square format, because I am thinking of presenting the photos as pains in a window, below is my first attempt at this idea.

my thoughts are that I might take a photo of a real window and add photos to that panes even if they are uneven. I think as the photos are largely of old windows, I need to match that in the presentation.

Collecting – Initial thoughts

executing the idea!

So I’m worrying! or is that panicking!!  I have my idea and I’ve taken a couple of test shots.  I like my idea, but my struggle now is how to execute it within the time scale I have?

I don’t want to be forced to do something else or not feel I’ve achieved my plan to the best of my ability because of the fact that I am at work pretty much all of the time there is daylight at the moment. aaaaaargh!!!

_DJF2764

test shot

Although this photo isn’t exactly very artistic, I was testing my idea of watching people, comfortable in their own spaces, coupled with the reflection of what’s on the outside. Inspired by Mona Kuhn’s work, which I really connected with.

When I took this one, I was also struck by the fact that you can’t actually see his face.  This gave me the idea of ‘seen but not seen’, you know that he’s there, but you can’t really see him, it reminded me of the glimpse of people you get in their homes as you pass by.  They are comfortable and feeling secure in their private spaces but in actual fact they are still partly visible to the outside world.

So my challenge is to execute this idea and make the images interesting!

The time of year isn’t helping with this! so do I consider night time images? or street photography, or do I put this thinking on hold and consider something more manageable in the time frame. I could simplify it to the reflections, but I do like the human element;   hmmm . . . . off to ruminate . . . . .


Collecting – research


f27d9750d94411e7992681e20c10e604.map

I really like the theme of heads, and I like the idea of reflections and through windows, so if I put all of this together, my theme would be:

people looking through windows, with the reflection of the outside – some images, I’ve found that I like


I ‘ve bought Mona Kuhn’s book ‘Evidence’ which I really like and want to use as inspiration.

Project 2 – Lens Work – thoughts

My thoughts about deep and shallow depths of field:

here are some of my own images which demonstrate use of different depths of field.

_DJF2788

Long Furlong, April 2017

24mm f/22, 1/100 sec, ISO100 – came across this view whilst driving between Rustington and Findon.  Reminded me of the Windows default screen and stopped to take this photo. I agree that the small f stop and wide angle do work well for this kind of landscape. However, the notion that by having everything in focus, the view can choose where to look and focus within the scene seems a little mute!  Afterall, as the photographer, haven’t we already chosen where we want our views to look.  In most cases we will have edited the image as well, thereby, enhancing the characteristics we want to promote.  Admittedly, one does have the option to roam around with the image and look at different elements within it. Perhaps that what Bazin means:

(Bazin (1948) quoted in Thompson & Bordwell, 2007)

I think that possibly, I like directing the viewers eyes to what I think is important, because it’s probably why I took the photo in the first place.

_DJF8926-Edit_nologo

Poppies, Brighton, June 2017

These other photos are more my normal style, using a shallower depth of field, or in the case of the woodpecker, the use of the zoom lens, because the subject is not close, which almost forces the background to be out of focus.

_DJF4579-Edit

Greater Spotted Woodpecker, Millers Wood, April 2017

In this autumn leaves photograph I wanted to focus in on the leaves, but I love the colour contrasts between the leaves and the background and with the very shallow depth of field it gives a very abstract look

_DJF5546-Edit

Autumn Leaves, Hotham Park, November 2016

Project 2 – Lens Work

Research – Photographers and Artists

Ansel Adams (1901-1984):

Famous for black and white wilderness photos, and membership of club f64, the name of the group is taken from the smallest setting of a large-format camera diaphragm aperture that gives particularly good resolution and depth of field.

The group believed in the “innate honesty” of the camera, which, as Weston described, “should be used for a recording of life, for rendering the very substance and quintessence of the thing itself, whether it be polished steel or palpitating flesh.” The f/64 photographers were concerned with natural subjects—Weston’s evocative close-ups of fruits and vegetables, for example, or Adams’s sublime images of Yosemite National Park, nudes, and everyday objects. In their 1932 manifesto, Group f/64 described pure photography as “possessing no qualities of technique, composition, or idea derivative of any other art form,” a conviction very much in line with modernism’s celebration of the intrinsic qualities of each medium—paintings should be painterly, photographs should be photographic, and sculptures should be sculptural.

https://www.artsy.net/article/theartgenomeproject-how-ansel-adams-and-the-photography-group

and teaching the ‘zone system‘, which is a way of calculating perfect exposure no matter what the conditions.  It mostly related to film photography but could be used in digital photography.

07ALTMAN-blog427

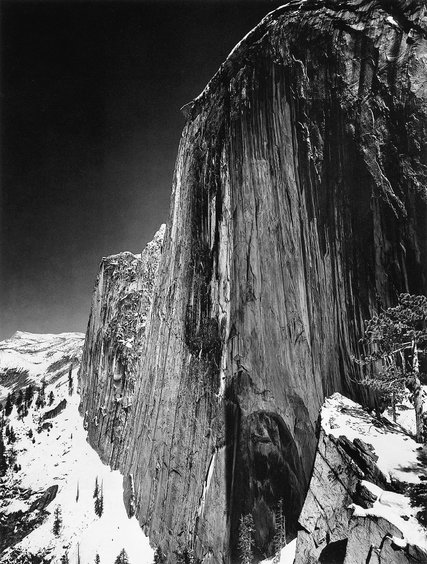
Half Dome, Ansel Adams (1927)


Fay Godwin (1931-2005)

British photographer, used her images to campaign for conservation of the british countryside. Mostly used deep focus

Godwin’s exceptional body of work, her outspoken personality and her genuine concern for the environment made her a unique figure in British photography. Her unpretentious attitude to photography and her devotion to the landscape are captured in this quote from one of her final interviews, with journalist David Corfield in 2004:

‘I don’t get wrapped up in technique and the like,’ she said. ‘I have a simple rule and that is to spend as much time in the location as possible. You can’t expect to take a definitive image in half an hour. It takes days, often years. And in fact I don’t believe there is such a thing as a definitive picture of something. The land is a living, breathing thing and light changes its character every second of every day. That’s why I love it so much.’
Read more at http://www.amateurphotographer.co.uk/technique/fay-godwin-1931-2005-iconic-photographer-18907#R7eEhF4wpR6vAmlv.99
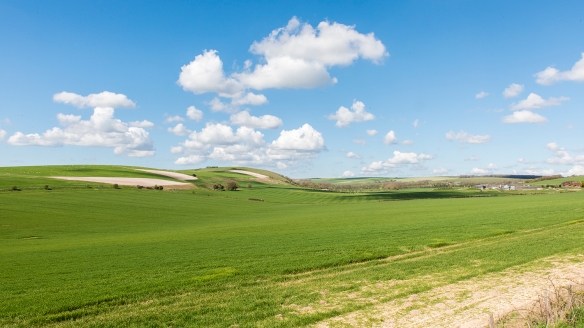
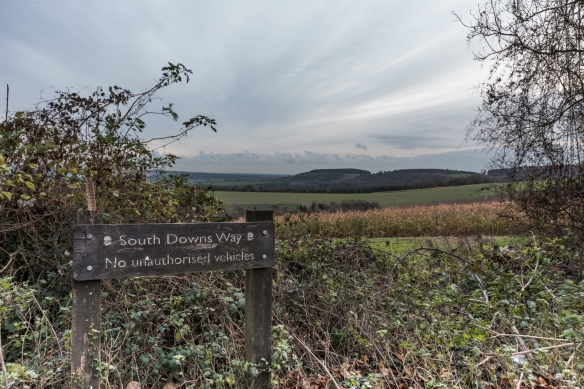
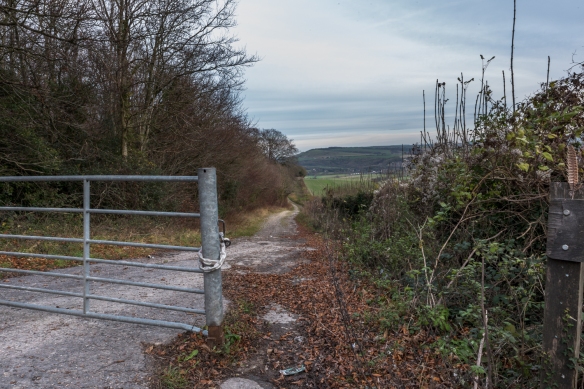
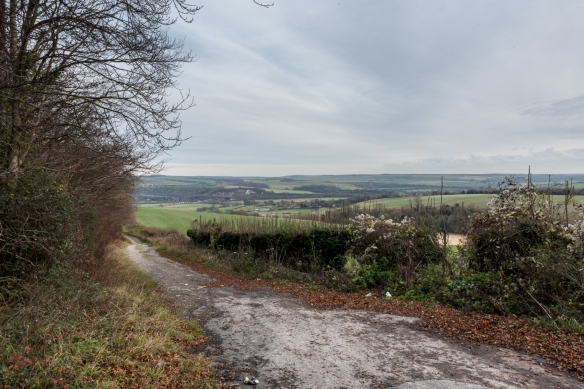
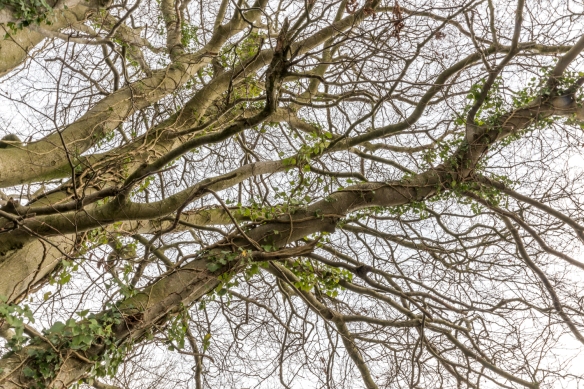
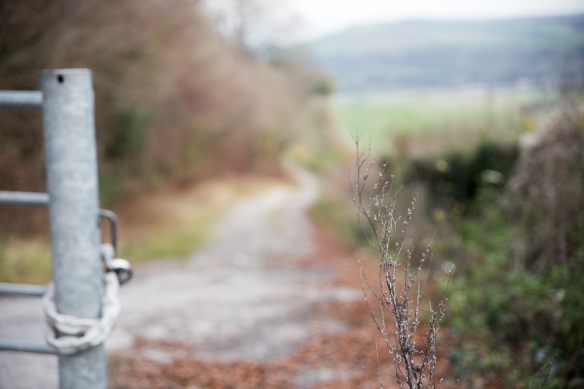
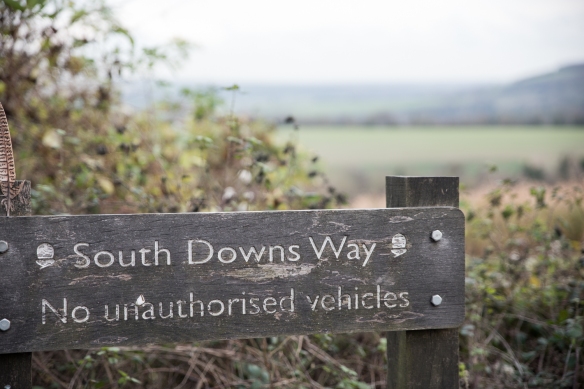
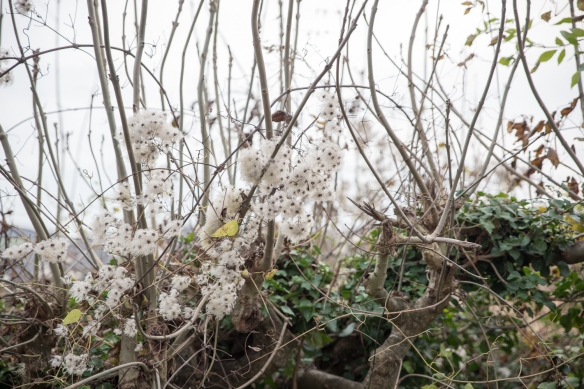
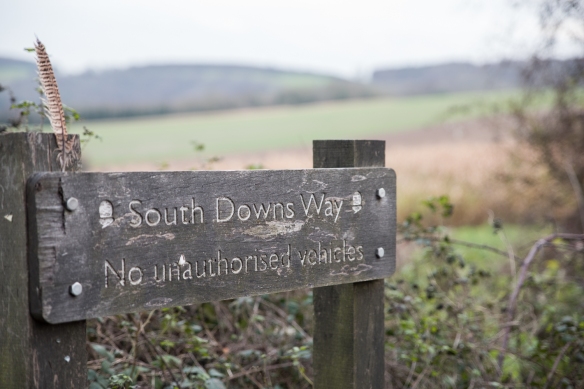
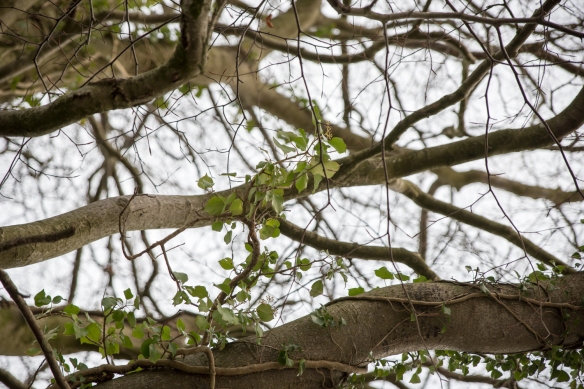
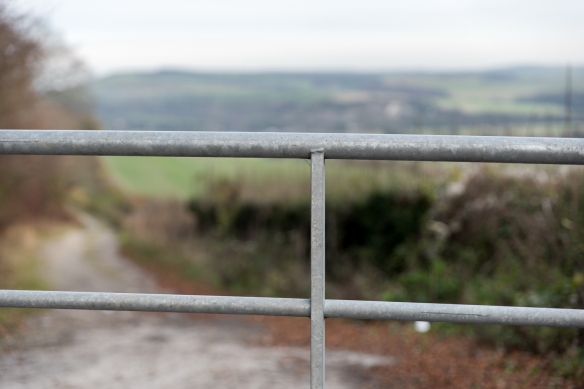
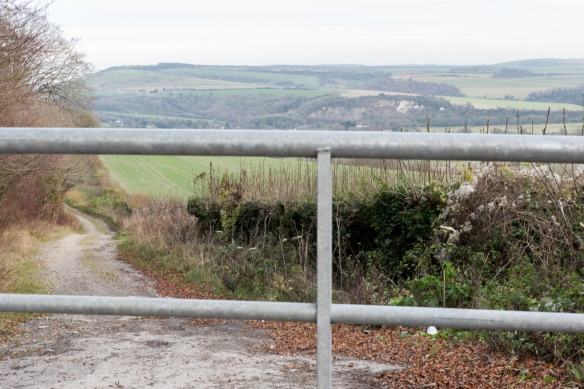
images by Fay Godwin – really like the atmosphere created and the depth created by having a focal point in the foreground which leads the eyes into the image.


Gianluca Cosci

Gianluca’s work seems a complete opposite from Ansel Adams and Fay Godwin’s.  He uses very shallow depths of field and shows us very limited views of his subjects.

Standardisation is a tool of control and constraint of people into reassuring and harmless psychological and architectural boxes in which any hint of improbable rebellion would be easily sedated.

My work tries to suggest these ideas showing sanitised office blocks, censored landscapes and lifeless environments. With my photographs I would like to insinuate a subtle sense of violence in our deeply hierarchical society. I am interested in the point of view of the loser, the marginalised.

Often we are forced to have only restricted views, uncomfortable to maintain. In spite of this, I believe that one can take advantage of this apparent fault and use it to observe and understand things in a different, unexpected way.

Gianluca Cosci, 2006

In his interview with Kevin Byrne in April 2016, Gianluca says “G.C.: I don’t really consider myself a “photographer” rather an artist without a defined, strict identity… “

He seems to have a real issue with capitalism and the immense wealth of a few.  I think by denying us the full view of their creations he is pouring doubt on their achievements and giving us a more abstract art where we can interpret it how we wish. This may stem from his roots in small town Bologna in Italy where wealth and power may be less obvious. Is this a visual interpretation of his own feelings of self worth or pushing the viewer to think freely?

These 3 photographers had different viewpoints

  • Ansel Adams – the pure wonder of nature
  • Fay Godwin – mans effect of the beauty of nature
  • Gianluca Cosci – Manmade creations and their link with power and suppression of free thinking


Mona Kuhn:

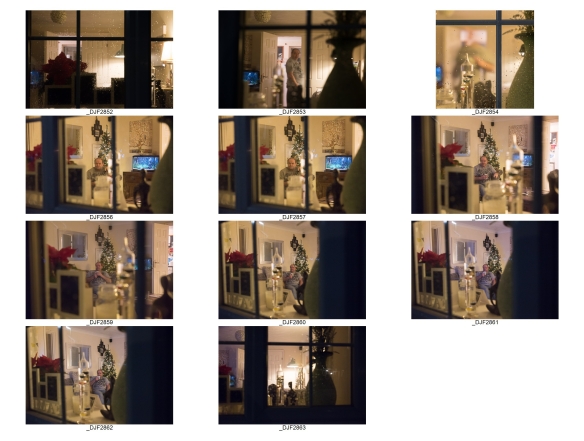
As soon as I saw Mona’s images, I absolutely connected with them, I love the imagery, and colouration.  The soft creams and browns coupled with the duel exposures of looking through the windows at her subjects. She has used a fairly shallow depth of field which gives a soft dreamy look.

This is something I’ve tried a lot in my own work, so definitely something I would like to emulate and take forward.

Kim Kirkpatrick:

just 5 photos!!! very shallow depth of field, in industrial landscapes not very inspiring to me.

Guy Bourdin (1928 – 1991)

Guy Bourdin, was a French artist and fashion photographer known for his provocative images. From 1955, Bourdin worked mostly with Vogue as well as other publications including Harper’s Bazaar.

All of Guy’s photos are sharp throughout and yet still have a very graphic and artistic quality.


web references:

https://www.artsy.net/article/artsy-editorial-photograph-made-ansel-adams-famous

https://photography.tutsplus.com/tutorials/understanding-using-ansel-adams-zone-system–photo-5607

http://www.amateurphotographer.co.uk/technique/fay-godwin-1931-2005-iconic-photographer-18907

https://www.widewalls.ch/10-landscape-photographers/ansel-adams-2/

http://www.gianlucacosci.com/page15.htm

http://www.monakuhn.com/

http://www.kimkirkpatrick.com/Artist.asp?ArtistID=23660&Akey=FGWAF5R9&ajx=1#!pf97163

http://www.tate.org.uk/art/artists/guy-bourdin-13592

2.7 – The distorting lens

Use a combination of small apertures and wide lens to take a number of photographs
exploring deep depth of field. Because of the small apertures you’ll be working with
slow shutter speeds and may need to use a tripod or rest the camera on a stable
surface to prevent ‘camera shake’ at low ISOs. Add one or two unedited sequences,
together with relevant shooting data and an indication of your selects, to your
learning log.

Achieving deep depth of field might appear easy compared to the difficulties of
managing shallow depth of field. We’re surrounded by images made with devices
rather than cameras whose short focal lengths and small sensors make it hard
to achieve anything other than deep depth of field. The trick is to include close
foreground elements in focus for an effective deep depth of field image. Foreground
detail also helps to balance the frame, which can easily appear empty in wide shots,
especially in the lower half. When successful, a close viewpoint together with the
dynamic perspective of a wide-angle lens gives the viewer the feeling that they’re
almost inside the scene.

all images taken using Aperture Priority – ISO 200, 24 mm, f/22 (the highest my lens would go) and 1/4 sec. Taken  using a tripod

_DJF2688_DJF2694-Edit_DJF2728-Edit_DJF2734

These do give a better feel of being there in the landscape

2.6 – The distorting lens

Exercise 2.6
Use a combination of wide apertures, long focal lengths and close viewpoints to take a number of photographs with shallow depth of field. (Remember that smaller f numbers mean wider apertures.) Try to compose the out-of-focus parts of the picture together with the main subject. Add one or two unedited sequences, together with relevant shooting data and an indication of your selects, to your learning log.

Wide apertures create shallow depth of field, especially when combined with a long focal length and a close viewpoint. In human vision the eye registers out-of-focus areas as vague or indistinct – we can’t look directly at the blur. But in a photograph, areas of soft focus can form a large part of the image surface so they need to be handled with just as much care as the main subject.

Don’t forget that the camera’s viewfinder image is obtained at maximum aperture for maximum brightness and therefore at the shallowest depth of field. Use the depth of field preview button to see the actual depth of field at any particular aperture. (This is especially useful in film cameras where you don’t have the benefit of reviewing a shot immediately after you’ve taken it). It’s surprising to see the effect that a single f stop can have on the appearance of an image.

_DJF2696

ISO 200, 70 mm, f/2.8, 1/200

_DJF2692

ISO 200, 70 mm, f/2.8, 1/160

_DJF2713

ISO 200, 70 mm, f/2.8, 1/160

_DJF2726

ISO 200, 70 mm, f/2.8, 1/125

_DJF2732

ISO 200, 70 mm, f/2.8, 1/200


2.5 – The distorting lens

Exercise 2.5
Find a subject in front of a background with depth. Take a close viewpoint and zoom
in; you’ll need to be aware of the minimum focusing distance of your lens. Focus on
the subject and take a single shot. Then, without changing the focal length, set the
focus to infinity and take a second shot.

_DJF2700

Shallow Depth of Field, Close viewpoint

_DJF2699

deep depth of field, long focal point

wasn’t sure I got it quite right out in the field, so tried it again at home, although I think both sets demonstrate the point about close viewpoints and focal point


2.4 – The distorting lens

Exercise 2.4
Find a location with good light for a portrait shot. Place your subject some distance in front of a simple background and select a wide aperture together with a moderately long focal length such as 100mm on a 35mm full-frame camera (about 65mm on a cropped-frame camera). Take a viewpoint about one and a half metres from your subject, allowing you to compose a headshot comfortably within the frame. Focus on the eyes and take the shot.

Longer focal lengths appear to compress space, giving a shallower depth of acceptable sharpness, which is known as depth of field. This makes a short or medium telephoto lens perfect for portraiture: the slight compression of the features appears attractive while the shallow depth of field adds intensity to the eyes and ‘lifts’ the subject from the background.

_DJF2662-Edit

Stanley, December 2017

_DJF2671-Edit

Riley, December 2017

This gorgeous pair both wanted to pose for this exercise, so obviously I had to photograph them both.

Aperture Priority: f/2.8, 70 mm, 1/250 sec, ISO1000

Particularly in the image of Riley, you can see the very shallow plane where sharpness is in the three fence strips level with him. The wall in the distance is just a colour and shape. In both images, the subjects standout from the background.

I absolutely love the image of Riley when edited in black and white. I also added a colour look up filmstock layer to give it timeless film quality.   There seems to be a real connection with him, which I think is more pronounced in the black and white version and I like the fact he’s not smiling.

_DJF2671-Edit_1.jpg

Riley

2.3 – The distorting lens

Exercise 2.3:

Choose a subject in front of a background with depth.  Select your shortest focal length and take a close low viewpoint, below your subject.  Find a natural point of focus and take the shot.

I chose to display this image in black and white, because it emphasises the distortion.

The model is only 9″ tall, but looks much bigger in relation to its surrounds because of the low viewpoint.  The background also appears to be falling backwards, even though it’s perfectly vertical wall.

Finally the bottom of the model (closest part to the viewpoint) looks out of proportion with the rest of the model.

This answers my question of Exercise 2.2, in relation to my height.  I will need to be aware of that when taking photos, especially portraits as using this angle might distort someones features.

Traditionally, this focal point might be used for a man, in order to make him look taller and more powerful in the frame!